YouTube voiceovers are crucial elements in digital content that enhance engagement by providing narration that guides, informs, or entertains viewers. As the digital landscape evolves, YouTube tutorials, explainer videos, and entertainment content increasingly rely on quality voiceovers to enhance viewer retention and content value. As reported by YouTube, channels that utilize high-quality voiceovers see up to a 40% increase in viewer engagement and a 15% longer watch time on average.
Recognizing the value and impact of voiceovers, this article serves as a comprehensive step-by-step guide aimed at beginners looking to record their first YouTube voiceover. Whether for enhancing personal content or fostering a professional media presence, understanding the process of recording and optimizing voiceovers is increasingly indispensable.
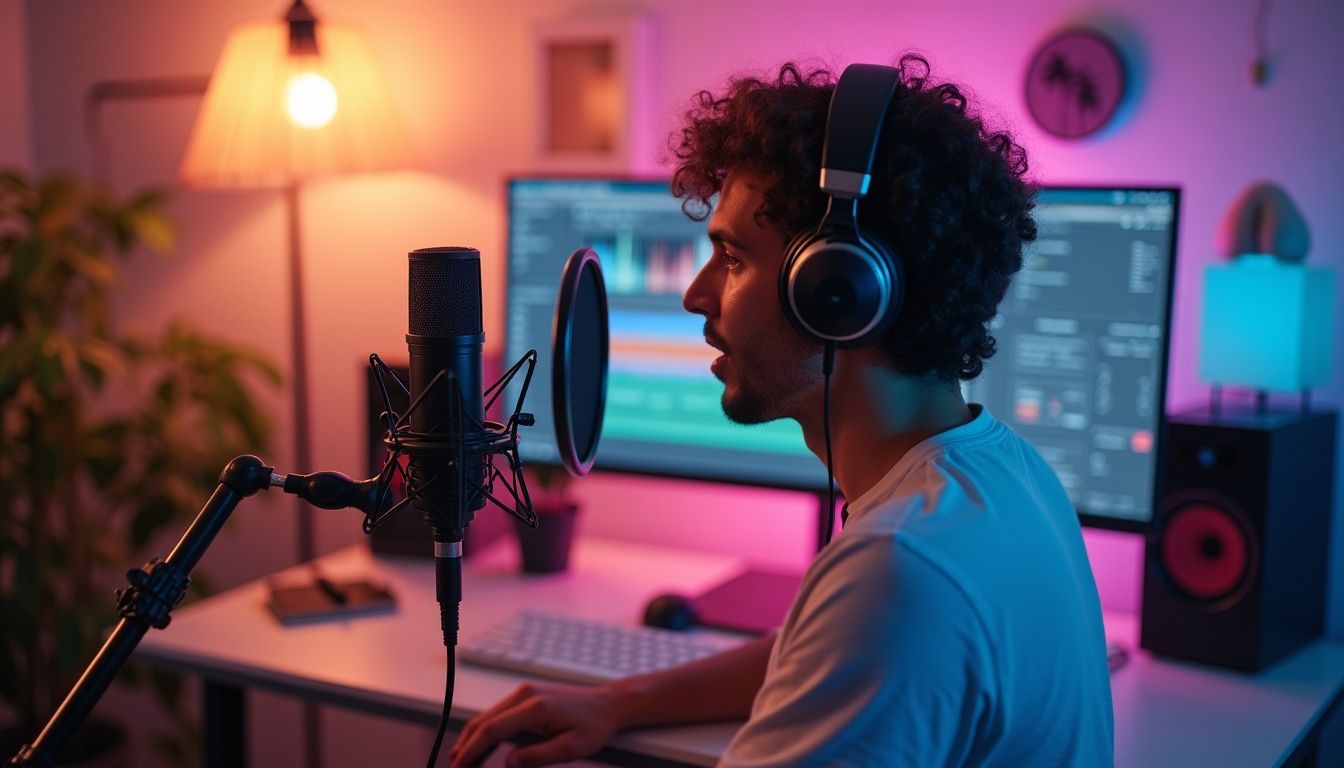
Tools and Equipment NeededRecommended Microphones for Beginners
Choosing the right microphone is the first and perhaps most critical step in achieving a professional-quality voiceover. Dynamic microphones and condenser microphones are the two primary types suited to beginners. Dynamic microphones, known for their durability and ability to handle high sound pressure levels, are ideal for loud, live settings. In contrast, condenser microphones capture a broader frequency range and higher fidelity sound, making them perfect for studio settings where subtle nuances in voice need to be captured.
Audio Interfaces vs. USB Microphones
For better control over audio quality, an audio interface connected to an XLR microphone can significantly enhance recording quality by providing better preamps, higher audio resolution, and more flexibility in microphone choice. USB microphones, however, offer a simpler and often more affordable setup, suitable for beginners who prefer plug-and-play ease.
Headphones for Monitoring
Closed-back headphones are essential for monitoring voice recordings. They isolate audio playback and prevent microphone pick-up of background noise, crucial for maintaining the integrity of the recorded audio.
Additional Tips on Acoustic Treatment
Effective acoustic treatment improves audio capture by reducing unwanted reverb or echo. Beginners can start with basic setups such as acoustic panels or foam to dampen excessive room noise. For DIY enthusiasts, heavy curtains and strategically placed bookshelves filled with books can provide an affordable start to soundproofing a room.
Scriptwriting Tips: Importance of a Strong Script
A compelling script is fundamental to any successful voiceover. It should be concise, scannable, and devoid of complex jargon that might confuse listeners. Instead, engaging and active language captures and holds the audience's attention. To aid this process, script readability tools and feedback from peers can be invaluable in refining the script before recording.
Practicing Your Voice: Warm-up Techniques
Vocal warm-ups are essential to prepare your voice for recording sessions. Simple exercises can include humming, lip trills, or reading aloud to smooth the enunciation and delivery. Consistent practice can significantly enhance the clarity and dynamic range of your voice.
Setting Up Your Recording Environment
The recording environment can greatly influence the quality of the voiceover. A quiet, well-insulated room is ideal. Using soft furnishings and minimizing hard surfaces reduces echo, improving the audio clarity. External noise can be minimized using draft excluders under doors and ensuring windows are well sealed.
Utilizing appropriate recording software is essential for creating professional voiceovers. Audacity, a free, open-source platform, offers various tools for recording and editing voiceovers and is highly recommended for beginners. Paid options like GarageBand provide additional features that might be useful as one's skills advance.
Basic Audio Settings and Configuration
Setting up the right audio configuration is crucial. A 24-bit rate and a 48000 Hz sample rate are typically recommended settings that provide high audio fidelity suitable for YouTube uploads. The positioning of the microphone also plays a significant role in audio quality. The microphone should be placed slightly to the side of the mouth, about four to six inches away, to avoid plosives while capturing clear audio.
Recording techniques must avoid common mistakes, such as background noise intrusion or inconsistent audio levels. Keeping the microphone at a consistent distance and speaking at a steady, moderate pace can help maintain audio consistency.
Understanding Audio Format and QualityDifferent audio formats affect the file size and quality of recordings. WAV files, for instance, offer high-quality sound perfect for editing but take up more space. MP3 files, while more compressed and thus of lower quality, are better suited for final distribution as they require less bandwidth for streaming or downloading.
Understanding bit rate and sample rate is essential for optimizing audio quality for YouTube. An optimal bit rate for high-quality voiceover is typically between 192 kbps to 320 kbps, which offers a good balance between quality and file size, making it ideal for online streaming.
The audio settings, ultimately, should align with the specific requirements of the content and the distribution platform, ensuring the best listener experience without unnecessarily large files.
Case Studies on Effective Voiceovers
To illustrate the importance of effective voiceovers, let's consider a few recent case studies. A channel dedicated to educational content on YouTube implemented professional voiceovers in their videos and noted a 50% increase in subscriber rates. This jump can be directly correlated with the clarity and engagement achieved through quality narration as viewers found the content more accessible and enjoyable.
Another example comes from a small entrepreneur who utilized voiceovers to personalize their brand storytelling in product videos. By doing so, viewer retention increased dramatically, with an average watch time rising from 2 minutes to over 5 minutes. This highlights how a focused and engaging voice-over can significantly impact customer interest and rapport.
Statistics from a recent survey indicated that 70% of consumers prefer videos with voiceovers over those without. These findings underline the essential role voiceovers play not only in enhancing engagement but also in promoting understanding and connecting with audiences on a deeper level.
Choosing the Right Voice for Your AudienceSelecting the right voice is equally important as quality hardware and software. The voice you choose should resonate with your target audience. A youthful, energetic tone may appeal to a younger demographic, while a calm and authoritative voice might be better suited for educational or professional content. Analysis of voice preferences across different demographics shows variability, yet clear and articulate narration tends to be universally appreciated.
Another aspect to consider is the pace at which you deliver your voiceover. Studies suggest that a rate of 150-160 words per minute is generally optimal for retaining audience attention while ensuring clarity. Slower or faster rates could lead to disengagement; hence it's crucial to match the voice speed to audience expectations and content requirements.
Additionally, consider cultural and language considerations when selecting a voice for localization. Adapting the voiceover to align with local dialects, accents, and references can improve relatability and comprehension among diverse audiences. Recent statistics show that localized content can increase user engagement by 40%, emphasizing the value of this approach.
The Editing ProcessOnce the voiceover is recorded, the editing phase is where the magic happens. This part involves cleaning up the audio to ensure it is polished and professional. Typically, this includes removing background noise, adjusting volumes, and mixing the voiceover with background music or sound effects. Tools like Adobe Audition or Logic Pro can be particularly useful for these tasks, offering advanced features to refine audio quality further.
Equalization (EQ) is fundamental in the editing process, allowing you to adjust frequency levels to enhance the natural sound of the voice. For instance, reducing frequencies around 250 Hz can minimize muddiness, while boosting around 3 kHz can enhance clarity in voice recordings. Understanding and utilizing EQ effectively can elevate the overall auditory experience.
Additionally, compression is often applied to voiceovers to level out volume fluctuations, ensuring a consistent listening experience. This process helps to keep softer spoken words audible and prevents louder sections from overwhelming the listener, thereby maintaining engagement throughout the content.
Analyzing the final audio is essential before uploading. Listening to how the voiceover integrates with visuals and ensuring that it complements rather than distracts from the video content can greatly influence viewer perception and comprehension. Furthermore, using feedback from test audiences can provide insights into how the final product resonates.
Distribution and OptimizationBefore distribution, optimizing the voiceover and associated content for various platforms is crucial. For YouTube, ensure that audio formats are compatible and adhere to best practices such as maintaining a high bit rate for streaming quality. The file size should also be manageable for quick downloads while upholding audio integrity.
Keywords play a pivotal role in optimization for search engines. Integrating relevant keywords associated with your content while ensuring they fit naturally into the script can enhance discoverability. Recent analytics indicate that videos with optimized titles and descriptions are 50% more likely to be recommended by YouTube’s algorithm, thus increasing potential viewer engagement.
Thumbnail design is another often overlooked aspect of distribution. A compelling thumbnail, combined with a captivating voiceover, can significantly increase click-through rates. Engaging visuals paired with persuasive audio can create a cohesive message that resonates with potential viewers.
Effective engagement strategies include analyzing audience metrics post-publication, which can offer insights into the success of your voiceover approach. Metrics such as audience retention rates and feedback can help refine future content strategies and optimize ongoing voiceover performances.
Introduction to Audio EditingEditing your audio effectively is crucial for achieving that crisp, professional sound that captivates YouTube viewers. This section will walk you through the essential software and basic techniques needed to refine your voiceover recordings. Whether you're using Adobe Audition, Reaper, or another sophisticated tool, mastering these fundamentals is key to enhancing your audio's clarity and impact.
Basic Editing TechniquesOnce you've recorded your voiceover, the next step is editing. This is where you can truly elevate the quality of your audio. Here are essential techniques every creator should know:
Cutting and Trimming Audio ClipsThese are the fundamental editing actions. Cutting removes unwanted parts, and trimming adjusts the length of your clips to fit your video perfectly. For instance, if there's a long pause or a mistake during recording, cutting that segment can streamline your content. Trimming is essential for ensuring your audio flows seamlessly, enhancing the overall viewer experience.
Adding Effects: Compression, EqualizationCompression helps in leveling your audio’s volume by reducing the dynamic range, ensuring that softer sounds are amplified while louder sounds are lowered. This can create a more consistent listening experience. Equalization adjusts the balance of frequencies within your audio track, allowing you to enhance or diminish specific tonal ranges. For example, applying a high-pass filter can eliminate unwanted low-frequency noise, giving your voiceover a clearer sound.
Noise Reduction TechniquesBackground noise can be a major distraction during playback. Tools like Audacity and Adobe Audition feature noise reduction capabilities that are vital in cleaning up your audio. For instance, you can use a noise profile to capture the sound of the background and then reduce it across the entire track, allowing your voice to stand out. Additionally, using proper recording techniques, such as choosing a quiet space and utilizing directional microphones, can greatly minimize noise at the source.
Advanced Editing TechniquesFor those looking to take their voiceovers to the next level, these advanced techniques can help:
Layering Multiple Audio TracksThis involves adding several layers of audio, each with a different element. It could be multiple voice tracks, sound effects, or ambient sounds, each contributing to a rich auditory experience. For example, a commercial voiceover may include soft background music, sound effects of the product in use, and narrative layers that guide the viewer's understanding.
Adding Background Music to Enhance VoiceoverChoosing background music that complements your voice is crucial. The music should enhance your message without overpowering your spoken words. Opt for tracks that match the content's mood—for instance, upbeat themes for energetic content and softer melodies for more serious topics. Adjust the volume to ensure that it remains in the background, preserving clarity in your narration.
Synching Voiceover with Video ContentThe key here is to ensure that your audio cues perfectly align with your visual elements. This synchronization is crucial for maintaining viewer engagement and conveying your message effectively. For example, if you're producing a tutorial, ensure that verbal instructions match the actions happening in the video, allowing viewers to follow along easily.
Exporting Your Final VoiceoverWhen you’re done editing, it’s time to export your voiceover into a format suitable for YouTube. Here are some tips to keep in mind:
Choosing the Right File Format for YouTubeWhile YouTube supports various audio formats, AAC (Advanced Audio Codec) in an MP4 container is recommended due to its balance of quality and compatibility. This ensures that your audio sounds good across various devices and platforms.
Settings for Optimal QualityExport your audio at a bitrate of at least 256 kbps for high-quality sound. Additionally, ensure your sample rate is set to 48 kHz, which is the standard for video production. This combination will result in clear, broadcast-quality audio that is specifically optimized for online content.
ConclusionThrough careful recording and detailed editing, you can produce high-quality voiceovers that significantly enhance your YouTube videos. Remember, the key to success in creating engaging and professional audio content lies in meticulous preparation, effective use of technology, and creative mixing. Don't hesitate to explore various techniques and tools to discover the perfect workflow that works best for you. By continuously refining your audio skills, you'll pave the way for more compelling and captivating content.
FAQs What is the best editing software for beginners?Adobe Audition and Audacity are both excellent choices for beginners due to their user-friendly interfaces and comprehensive features. Audacity is particularly appealing as it is free, offering a wealth of tools that can accommodate the majority of audio editing needs.
How do I choose background music for my voiceover?Select music that complements the tone and pace of your spoken content. Instrumental tracks often work best as they don’t compete with the voiceover. Additionally, consider using royalty-free music sources like Epidemic Sound or Artlist to avoid copyright issues.
Can I edit a voiceover on my smartphone?Yes, there are several mobile apps available for audio editing, such as WaveEditor and Lexis Audio Editor. While mobile editing can be useful for quick adjustments, desktop software typically offers more advanced features and a more precise editing experience.
By mastering these editing techniques and understanding the importance of quality audio, you can greatly improve the professionalism of your YouTube voiceovers, ultimately leading to better audience retention and engagement.
Recent Trends in Audio EditingIn 2026, the audio editing landscape continues to evolve, and several trends have emerged in audio post-production for video content creators:
- Integration of Artificial Intelligence: AI tools are increasingly being integrated into audio editing software, offering features like automatic noise reduction, voice modulation, and adaptive mixing, making the editing process more efficient.
- Increased Use of Podcasts: As podcast popularity rises, creators are learning to apply similar audio editing techniques to their videos, focusing on storytelling and engaging audio dynamics.
- Remote Collaboration Tools: With many creators collaborating across distances, cloud-based audio editing and project-sharing platforms are becoming essential for teamwork, enabling multiple users to edit and produce audio in real-time.
Staying abreast of these trends not only ensures that your content remains relevant but also enhances the potential for audience engagement by making your audio more appealing and polished.